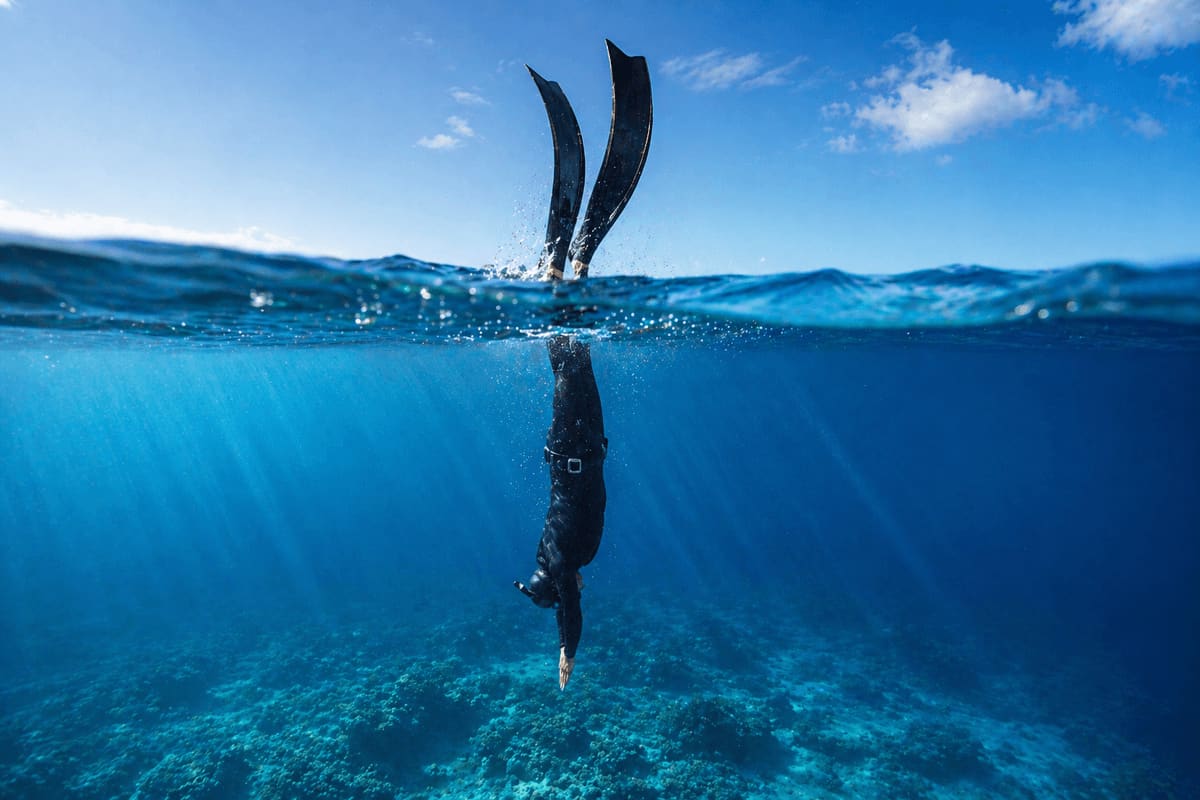

Safety First
Never practice static apnea or breath-hold training alone. All in-water breath-hold practice requires a trained buddy watching continuously. Dry training (on land) is the exception: you can practice CO2 tables safely without a buddy.
What Breath-Hold Training Actually Adapts
Most people assume a longer breath hold comes from bigger lungs. It does not, at least not for the first several years of training. Lung volume is largely set by your height, your sex and your genetics, and the changes available through training are small. What changes dramatically, and quickly, is how your nervous system responds to the signals that make you want to breathe. Breath-hold training is a tolerance and relaxation skill wearing the costume of a physical one.
That distinction matters because it tells you what to train. If breath-hold time were a lung-size problem, the answer would be stretching and volume work. Because it is mostly a tolerance problem, the answer is repeated, controlled exposure to the exact sensations you find unpleasant. There is still a place for chest and diaphragm flexibility work, covered in more detail in our guide to increasing lung capacity, but it is a supporting act rather than the main event.
Adaptation one: CO2 tolerance
The urge to breathe is not an oxygen alarm. It is a carbon dioxide alarm. Chemoreceptors in your brainstem and in the walls of your arteries track rising CO2 and falling blood pH, and once those cross a threshold the diaphragm starts contracting whether you approve or not. Untrained divers usually quit at that first contraction, believing they are out of air. In reality most of them still have a large oxygen reserve. Training moves the threshold at which those signals become intolerable, and it moves it fast: this is where the first few weeks of improvement come from.
Adaptation two: oxygen efficiency
The second adaptation is slower and less dramatic. Over months of consistent apnea training the body becomes better at doing more with less oxygen: lower resting heart rate during holds, a stronger vasoconstriction response, better tolerance of the acidic environment that builds up in working muscle, and in long-term freedivers a measurably larger spleen contraction that adds oxygen-carrying red blood cells to circulation. These changes are real but they are measured in months and years, not weeks.
Adaptation three: the dive reflex
The third piece is the mammalian dive reflex, a set of involuntary responses triggered by breath-holding, cold water on the face, and pressure. Heart rate drops, peripheral blood vessels narrow to keep oxygenated blood around the heart and brain, and the spleen contracts. The reflex is trainable in the sense that it becomes faster and stronger with regular exposure. It is also why a hold in water almost always beats the same diver's hold on a sofa, often by 20-40%.
Adaptation four: the mind
The last adaptation is the one nobody wants to hear about. A breath hold is a slowly escalating argument with your own panic response, and the divers who win it are the ones who have practised being calm while uncomfortable. Tension in the jaw, the shoulders, the hands and the gut burns oxygen and raises CO2 production. Learning to stay soft under stress is worth more seconds than any amount of chest stretching.
Finding Your Baseline and Calculating Table Times
Every number in this article is a percentage of your own maximum, so the first job is to establish that maximum honestly. If you have never timed a breath hold, our guide to how long you can hold your breath gives realistic ranges for untrained and trained divers so you can see where you sit.
How to measure a baseline
- 01 —Choose a rested day. Not after a hard workout, not after a bad night, not after coffee.
- 02 —Lie down somewhere comfortable and safe on dry land, with a timer in view.
- 03 —Breathe normally and calmly for at least two minutes. No hyperventilation, no deep purging breaths.
- 04 —Take one full but relaxed inhale, around 80-90% of absolute capacity, and start the timer.
- 05 —Hold until the discomfort is firm but still manageable. This is not a maximum attempt.
- 06 —Stop, breathe, and write the number down.
- 07 —Repeat the whole process on a second day and take the lower of the two times as your working baseline.
Using the lower number is deliberate. A single lucky hold produces tables that are too hard, and tables that are too hard get abandoned. A baseline that feels slightly conservative produces a programme you will actually finish.
Turning the baseline into table times
- CO2 table holds
- 50-60% of baseline, held constant across all rounds
- CO2 table rest
- starts at roughly your hold length, then drops by 15 seconds per round
- O2 table holds
- start near 50% of baseline and climb toward 85% over six rounds
- O2 table rest
- fixed at 2:00 to 2:30 for every round
- Static practice holds
- 80% of baseline for most sets, with maximum attempts kept rare
Recalculate the baseline every three to four weeks. This is the single most commonly skipped step in apnea training. A table built on an eight-week-old baseline is not training you, it is entertaining you.
CO2 Tables, Building Tolerance
CO2 is what triggers the urge to breathe. Your oxygen could still be adequate for several more minutes, but if CO2 has risen enough, the diaphragm contracts and the urge to breathe becomes overwhelming. Most beginner freedivers hit their ceiling because of CO2 discomfort, not actual oxygen depletion.
CO2 tables train your nervous system to stay calm at elevated CO2. They are the backbone of any breath-hold programme, they are safe to perform dry and alone, and they produce the fastest visible improvement of anything in this article. Our dedicated guide to CO2 tables covers extra variations once the basic format feels routine.
The Format
Fixed hold time, decreasing rest interval. Each round: hold, then rest. The hold time stays the same. The rest interval decreases, so each successive hold starts with more residual CO2. By the final rounds you are beginning a hold already partway up the discomfort curve, which is exactly the point.
Example CO2 Table
For a diver with a 2-minute working breath hold, use 50-60% of your maximum.
The table should feel uncomfortable by rounds 5-6, not be a maximum attempt every round.
Worked CO2 tables for three baselines
The rest schedule below is identical for all three divers. Only the hold length changes, calculated at roughly 55% of each diver's measured maximum. Find the column closest to your own baseline and use it as written.
A complete table takes 12-20 minutes depending on your baseline. Two of these per week is enough in the early phase, and three is the practical ceiling before recovery starts to suffer.
How a good CO2 table should feel
- Rounds 1-3: easy, almost boring, no contractions
- Rounds 4-5: first diaphragm contractions arrive, breathing feels urgent between rounds
- Rounds 6-8: firmly uncomfortable, contractions early in the hold, still fully under control
- After the final round: recovery within three or four breaths, no dizziness, no tingling
If you cannot complete the last two rounds, the hold length is too long. If round eight still feels easy, the hold is too short. Adjust by 10-15 seconds and try again next session rather than improvising mid-table.
O2 Tables, Working at Lower Oxygen
O2 tables train the body to tolerate lower oxygen levels. The format is the inverse of CO2 tables, and so is the risk profile. Where a CO2 table leaves you with plenty of oxygen and a lot of discomfort, an O2 table deliberately walks your saturation downward round after round. That is why it belongs later in a programme, and why it needs supervision.
The Format
Fixed rest interval, increasing hold time. The rest is long enough for CO2 to clear and for your heart rate to settle. The holds get progressively longer, pushing oxygen lower each time, so the final round is the hardest by a wide margin.
Example O2 Table
For a diver with a 3-minute maximum.
Worked O2 tables for three baselines
Each column climbs from about 50% of that diver's maximum in round one to roughly 83% in round six. Rest is fixed. Longer baselines get slightly longer rest because they need more time to clear CO2 and return heart rate to a settled level.
Never add a seventh round because round six felt good. The table is designed to end while you still have margin. If the last round genuinely felt easy, your baseline has moved and the whole table should be recalculated upward next session.
Start O2 tables only after you are comfortable with CO2 tables and have a reliable training partner. One O2 session per week is plenty. Two is the absolute maximum for most divers, and even that should be separated by at least 72 hours. Anyone training O2 tables should also understand the mechanism behind shallow water blackout before their first session, not after.
Static Apnea Practice
The most direct form of breath-hold training: floating face-down in a pool, holding your breath for near-maximum duration. Static apnea removes movement, current, depth and equalization from the equation, leaving only the hold itself. That makes it the cleanest measure of progress and the best environment for practising relaxation. Our full guide to static apnea covers technique and mindset in more depth.
Session protocol
- 01 —Buddy in position at the wall, watching
- 02 —2-3 minutes of calm preparatory breathing (not hyperventilation)
- 03 —Full inhale, face down
- 04 —Hold until first contraction, then continue as long as comfortable
- 05 —Surface on your own terms, do not wait for rescue
- 06 —Exhale on surfacing, three full recovery breaths, OK signal to buddy
- 07 —Minimum 4 minutes rest before the next hold
Start at 80% of your maximum. Maximal attempts every session leads to slow adaptation and higher risk. A useful structure for a pool static session is one easy warm-up hold at 50%, two working holds at 75-80%, and one longer hold only if everything up to that point felt controlled.
What your buddy is actually doing
- Standing or floating within arm's reach for the entire hold, not watching from a lane away
- Tapping your shoulder at agreed intervals and expecting a finger signal back
- Watching for loss of motor control: twitching, a limp hand, a dropped signal
- Ready to lift your airway clear of the water immediately and remove the mask
- Confirming your recovery breathing and OK signal before relaxing
A buddy who is scrolling a phone is not a buddy. Swap roles between every hold so neither of you is watching for more than a few minutes at a time, and agree on the tap and signal protocol before the first hold rather than in the water.
Relaxation inside the hold
The physical hold is only half of static practice. The other half is a body scan performed while your diaphragm is protesting: jaw loose, tongue soft, shoulders down, hands open, no clenching in the feet. Divers routinely find 20-30 seconds of extra time simply by removing tension they did not know they were holding. Preparatory breathing matters just as much, and our guide to freediving breathing techniques covers what to do in the two minutes before a hold.
Dry vs Wet Training: What Each Is For
Dry training and wet training are not interchangeable, and confusing them is where most avoidable accidents start. The physiological difference is the dive reflex: face immersion and pressure trigger bradycardia and vasoconstriction, so the same diver typically holds 20-40% longer in water. The safety difference is far more important. On land, an unexpected blackout means you slump and start breathing again. In water, it means your airway floods.
The rule is simple and has no exceptions: anything involving water and a breath hold requires a trained buddy within arm's reach, every single time, including easy sets and including the shallow end. If you are building a pool routine around these sessions, our pool training guide sets out how to structure a full session safely.
Dry Training and Apnea Walks
Dry breath holds (on land) are safe to do alone and build CO2 tolerance effectively. They are typically 20-40% shorter than equivalent pool holds, but the adaptation carries over. For most people dry training is what makes the programme sustainable, because it removes the pool, the buddy and the travel from the equation on the days those are hard to arrange.
Useful dry exercises
- CO2 table sets
- lying still, watching a timer, normal preparatory breathing
- Walking apnea
- hold breath while walking at a normal pace, adds mild physical stress
- Box breathing between holds
- 4 counts in, 4 hold, 4 out, 4 hold
- Empty-lung holds
- short holds after a passive exhale, strong CO2 stimulus in very little time
- Contraction sitting
- hold only until contractions start, then continue for a fixed extra 20 seconds each round
How to do apnea walks
Apnea walks are the most useful CO2 tolerance tool that requires no equipment at all. Breathe calmly while standing for two minutes. Take a relaxed full inhale, start walking at an easy pace, and count steps until you have to breathe. Recover for two minutes of normal breathing, then repeat. Six to eight rounds is a full session.
- 01 —Walk on flat, soft, familiar ground. No roads, no kerbs, no stairs, no water nearby.
- 02 —Keep the pace conversational. This is a CO2 drill, not a fitness test.
- 03 —Record steps rather than seconds. Steps are easier to count and compare.
- 04 —Stop the round the moment your vision changes or your legs feel odd.
- 05 —Never do apnea walks on a treadmill, a balcony, or anywhere a fall would hurt.
Expect step counts to climb quickly in the first month. Adding movement raises CO2 production sharply, so an apnea walk delivers a strong tolerance stimulus in a fraction of the time a lying CO2 table takes.
Supporting Work: Flexibility, Fitness and Lifestyle
Tables and static holds are the training. Everything in this section is the foundation that decides how much benefit you actually extract from them, and it is where a lot of divers quietly leave minutes on the table.
Diaphragm and ribcage flexibility
A stiff ribcage makes a full inhale effortful, and effort costs oxygen. It also makes diaphragm contractions feel far more violent than they need to. Gentle daily work on thoracic rotation, side-body stretches, and slow full inhales held for a few seconds keeps the chest supple, and a short yoga routine for freedivers covers all three. Avoid aggressive packing or forced stretching at full inhale until you have years of training behind you and a coach watching, because that is where lung injuries come from.
Aerobic base
A stronger aerobic system lowers your resting heart rate and improves how efficiently your muscles use oxygen, both of which extend a hold. Two or three easy sessions a week of running, cycling or swimming at a conversational pace is enough. Very high-intensity training the day before a static session tends to backfire, because residual fatigue and a raised metabolic rate shorten holds noticeably.
Sleep and hydration
- Sleep
- a single short night can cost 15-20% of your usual hold, mostly through worse tolerance and higher baseline stress
- Hydration
- dehydration thickens blood and impairs the blood shift, and it makes ears harder to equalize on depth days
- Meal timing
- train at least 3 hours after a large meal, since digestion raises oxygen demand and a full stomach restricts the diaphragm
- Caffeine
- raises heart rate and alertness, which works against the calm you are trying to build, so keep it well before training
Why smoking and alcohol hurt
Smoking is the single most damaging habit for a freediver. Carbon monoxide from smoke binds to hemoglobin far more tightly than oxygen does, so a portion of your oxygen-carrying capacity is simply unavailable, and it can stay that way for many hours after the last cigarette. Smoking also irritates the airways, increases mucus, and makes equalization and recovery harder. Quitting produces some of the fastest breath-hold improvement available to anyone.
Alcohol works differently but is also costly. It dehydrates, disrupts the deep sleep that drives recovery, raises resting heart rate for many hours, and blunts the judgement that keeps breath-hold training safe. A drink the night before a training session reliably shortens holds the next day, and alcohol anywhere near an in-water session is an absolute no.
8-Week Progression
This plan assumes you can train three times a week, that you have measured a baseline, and that you have access to a pool and a buddy from week three onward. If you only have dry training available, repeat the week 1-2 structure with rising hold times and simply skip the pool columns. The progression is deliberately front-loaded with CO2 work, because that is where the fastest gains are.
Track every session: hold times, rest intervals, contraction point, how it felt. The data tells you when to progress. A log also catches the pattern nobody notices in the moment, which is that bad sessions cluster after short sleep, late meals and stressful days rather than arriving at random.
What to log after every session
- Date, session type, and where you trained
- Every hold time and rest interval as actually performed, not as planned
- The second at which the first contraction arrived
- A one to five rating of how hard the session felt
- Sleep the night before, last meal, caffeine, and general stress level
After eight weeks, most divers training consistently land somewhere between 20% and 40% above their starting baseline. Beginners with very short starting times often see far larger percentage gains, simply because there was so much untrained tolerance to recover.
How to Progress the Tables
Tables stop working the moment they become comfortable, and a table you can finish easily is a table that is maintaining you rather than improving you. The signal to progress is simple: two consecutive sessions where the final two rounds felt controlled and you recovered within three breaths.
Progression rules
- 01 —CO2 tables: add 10-15 seconds to the hold and reset the rest schedule to its original starting length.
- 02 —CO2 tables, alternative: keep the hold and cut 5 seconds from every rest interval instead. Change one variable, never both.
- 03 —O2 tables: recalculate every hold from a fresh baseline rather than adding time to the old numbers.
- 04 —Static practice: raise the working percentage from 75% to 80%, then to 85%, before ever adding rounds.
- 05 —Apnea walks: add steps, not rounds. Six to eight rounds remains the ceiling.
- 06 —Re-measure your baseline every three to four weeks and rebuild both tables from the new number.
Progress in one variable at a time. If you lengthen the hold and shorten the rest in the same week, a failed table tells you nothing about which change was too much. Divers who move slowly and change one thing at a time end up ahead within a few months, because they never lose weeks to overreaching and backing off.
Plateaus and What to Change
Almost every diver stalls somewhere. The first plateau usually lands around three months in, once the easy CO2 tolerance gains have been collected and the remaining progress has to come from relaxation, efficiency and consistency. A plateau is information, not a verdict.
If none of these apply, change the stimulus rather than the intensity. Swap a CO2 table for apnea walks, replace a static session with dynamic laps, or spend two weeks on flexibility and aerobic base with no timed holds at all. Novel stress often restarts progress where more of the same stress will not.
Common Mistakes in Breath-Hold Training
The errors below account for the overwhelming majority of stalled progress and near-misses in apnea training. Most of them come from treating breath-hold time as a test to be passed rather than an adaptation to be built.
The single most damaging of these is hyperventilation, because it does two bad things at once. It lowers CO2 without adding meaningful oxygen, which delays the urge to breathe past the point where oxygen is genuinely low, and it trains you to rely on a trick rather than on adaptation.
Safety Rules That Never Bend
Breath-hold training is safe when a small number of rules are followed without exception, and dangerous the moment they are treated as guidelines. Every one of the rules below exists because people have died from ignoring it.
Never hyperventilate
Deep, fast breathing before a hold blows off CO2 without meaningfully increasing oxygen stores. Since CO2 drives the urge to breathe, the warning system is silenced while the oxygen supply stays the same. The diver feels fine right up to the point of losing consciousness. This is the classic mechanism behind shallow water blackout, and it kills experienced swimmers as readily as beginners.
Never train breath-hold in water alone
There is no shallow enough, no short enough, no experienced enough. Blackout gives no reliable warning, an unconscious diver sinks or floats face-down silently, and lifeguards routinely fail to notice a still swimmer. A buddy must be within arm's reach, watching continuously, for every in-water hold including warm-ups.
Understand the difference between the urge to breathe and real oxygen need
- Urge to breathe
- driven by rising CO2, arrives well before oxygen becomes a problem, feels like tightness and diaphragm contractions, and is trainable
- Real oxygen shortage
- arrives later and much more quietly, produces tunnel vision, tingling, confusion and loss of motor control, and is not something you can push through
- Contractions
- a normal CO2 signal, not an emergency, and typically leave a large portion of a trained diver's hold still available
- Loss of motor control
- a genuine emergency, meaning the hold has gone too far and blackout may be seconds away
The whole point of structured training is to raise your tolerance for the first sensation while never approaching the second. A well-run session ends with a diver who is uncomfortable and completely in control, not one who is testing how close to unconsciousness they can get.
Session rules to follow every time
- No breath-hold training within 24 hours of scuba diving
- No breath-hold training while ill, congested, hungover or badly sleep-deprived
- Always recover with three full hook breaths and an OK signal after every water hold
- Stop the session entirely after any blackout, samba or loss of motor control, by anyone in the group
- Agree signals, tap intervals and rescue roles before entering the water